
I'm talking about swapping out receptacles. Like a trash receptacle? NO! Like an outlet. "Receptacle" is a term electrical engineers use to sound smart (I know because I was one). Those jerks.
But you definitely don't have to be an engineer or an electrician to change these out in your home! I am probably making this wayyyy more complicated than necessary, but no harm in being thorough - especially when safety is at stake.
Update: I don't want to scare you out of doing this, but my journeyman electrician friend made a good point I want to share with you: 120v is the #1 killer ... It doesn't take much to screw up the heart. People don't realize what electricity can do to you. Also because 120 is so popular here in the states because of it being in every household. People could be grounded and not realizing it, making a path for the current to go straight across your heart.
For reference, here's a link with helpful background information to know how your household wiring works.
How to replace an outlet (in 100 easy steps) (jk it only takes 3 minutes)
 |
| All my tools fall out of these loose garage outlets. |
First off, get a manicure. The juxtaposition of nice nails and tools is adorable. Then gather your materials and take off the outlet faceplate.
 |
| Phillips and flathead screwdrivers, small flathead screwdriver, pliers, tic tracer (optional), drill with screwdriver bits (optional), new outlet and cover |
Now turn off your circuit breaker! How do you know you turned off the right one? If you have a tic tracer, use it. If you don't have one, just plug in something that makes noise (like a radio) and listen for it to turn off when you hit the right breaker. Test it again before starting to work on it - you may not die if you get shocked, but it will scare you. A lot.
 |
| A tic tracer will light up, blink, or beep if it senses electricity. On mine, the green light means all clear. |

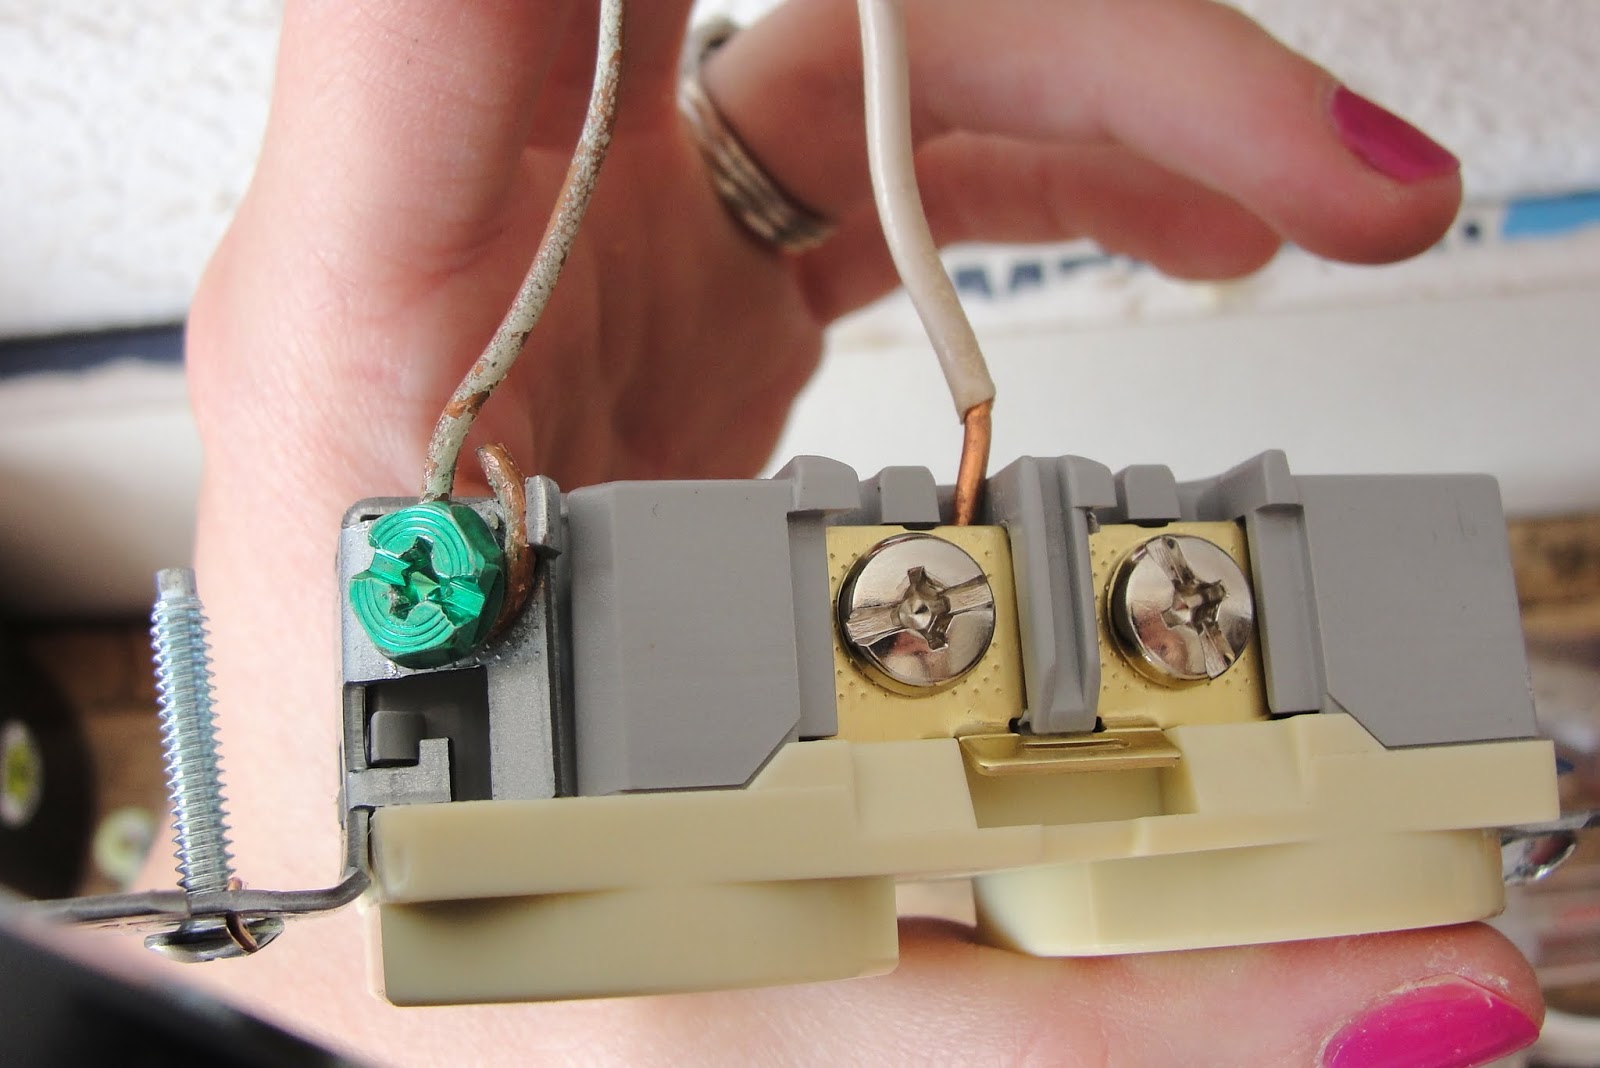
These outlets have been "quick-wired" so to get the wire out, I use this small screwdriver to press down on a spring that releases the wire. Your outlet might have the wires wrapped under the screws on the side, in which case you just loosen the screws and remove the wires. You will do this to 2-4 wires. Mine has 3 (the white wires, aka neutrals, are spliced together in the box).

Then loosen the green screw to release the ground.
 |
| What did I tell you about the manicure? It's a requirement. |

The black wires ("hot" wires) go under the brass screws. The white wires ("neutral" wires) go under the silver screws. And the ground (the non-insulated one) goes under the green screw.
 |
| These are quick-wired, so they just plug in under the metal plates. If they weren't, I'd have to use pliers to wrap the wires under the screws. |
Then tighten the screws so the wires won't move around. You do not want a lot of exposed copper!! Your ground wire could come in contact with it and short out your circuit!! Speaking from experience here. I probably should have trimmed the wires a little for this tutorial. Sorry.
Shove the wires back in, screw in the outlet, put on the faceplate, and flip the breaker! Enjoy your new outlet...

Womp womp. Since this was in the garage, I didn't change the color. But it holds my plugs tightly. Woo!
It's a little more exciting indoors. The old outlets were so old they were turning a weird shade of green. Plus, my brother visited and complained all his plugs were falling out of the outlets in the guest room (that I wasn't planning on updating) . So it was also a matter of necessity. And I did my whole house for about $60! You can also replace light switches, phone jacks, GFCIs, etc - here's a comparison for some I had switched out in my kitchen.

 |
| posted by Emma |


No comments:
Post a Comment
Give us your feedback!