
 |
| posted by Diana |
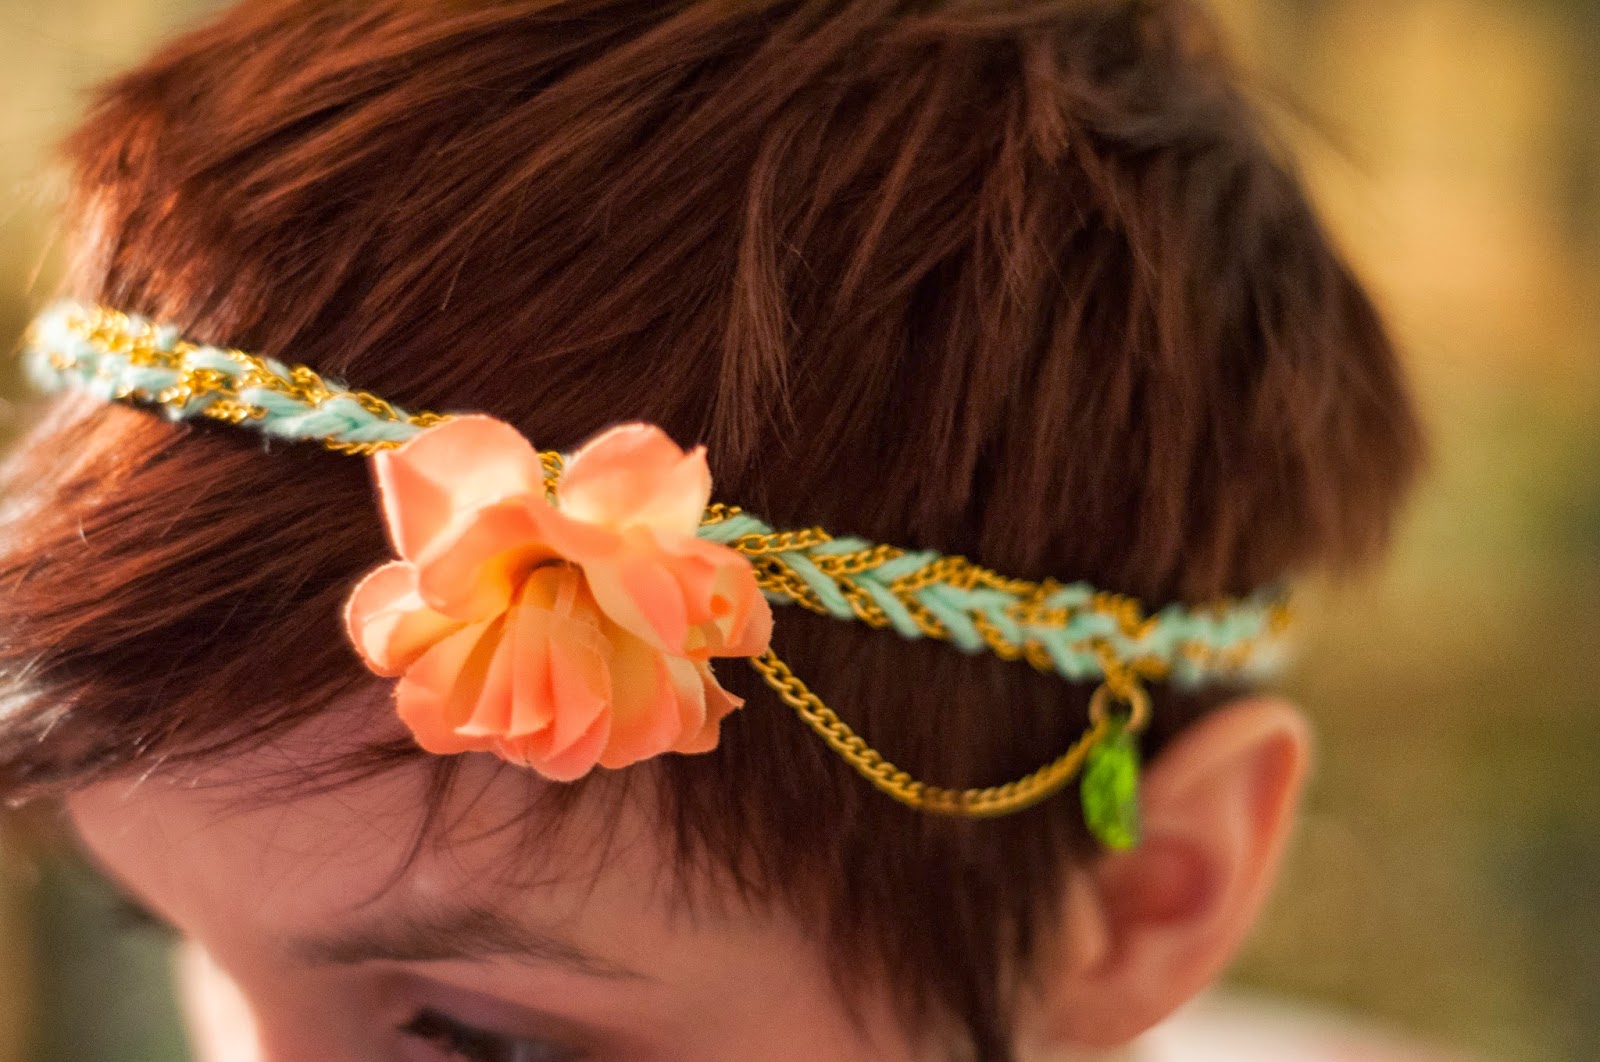
This headband is super simple to make, but the finished product looks a lot more complicated than these easy instructions. Plus, it's a great project for leftover yarn and jewelry supplies.

For this headband, you will need to know how to crochet a chain stitch as well as how to slip stitch to join in the round--here's a video tutorial on how to chain and one on how to join. Don't let the hook intimidate you--it's not difficult to use. I learned how to crochet when I was eight!
Materials:
The essentials--

- Measuring tape
- Crochet hook, size K
- Cotton yarn
- Jewelry chain
- Jump rings
- Pliers
- Wire cutters
- Scissors
- Yarn needle
- Faux flowers
- Thread
- Awl (or large needle)
- Sewing needle
- Charms and beads
- Glue gun (optional)
1. First things first--measure your head! Then, with your crochet hook, loosely chain stitch the cotton yarn held together with the jewelry chain. Continue your chain stitch for approximately half an inch less than your actual head measurement.
My head measures 21", so I crocheted a length of 20.5".
My head measures 21", so I crocheted a length of 20.5".

 |
| Here's a prototype headband with acrylic yarn and a smaller hook--this is why you have to crochet loosely! |
2. Join only the cotton yarn in the round with a slip stitch. Do not join the chain. Cut the yarn, leaving a 6" tail, and pull only the yarn through the loop. The yarn is now attached in the round.
 |
| View of the cotton join--the jump ring join is on the other side. |
3. Once the yarn is securely bound, cut the chain with wire cutters. Use jump rings to attach the chain ends. The chain is now joined in the round.
 |
| I used large jump rings I had on hand for this mint and gold headband--next time I'll use smaller ones. |
4. Weave in the yarn ends. Cut any excess chain (or leave it dangling if you like the look of it).
Now you have a complete headband! You could stop here if you're going for a more subtle look... but why would you?
5. Use your awl (or large sewing needle) to poke holes through the plastic base of your faux flower. This creates a shank button-like back. I poked about eight holes in the base of my flower to create four cross-sections.
Sew the flower to the cotton yarn as you would a shank button. I chose to attach mine at the join to cover the knot.
If you're not a fan of sewing, just use a glue gun to attach your flower!
Sew the flower to the cotton yarn as you would a shank button. I chose to attach mine at the join to cover the knot.
If you're not a fan of sewing, just use a glue gun to attach your flower!
 |
| Creating holes to sew through. |
5. Using jump rings, attach more chain and beads at your discretion. I chose to keep mine simple.
That's it!

What do you think? Will Mother Nature take the hint and let spring head our way?
Also, this is the first time I've written a tutorial, so let me know if you have any questions or if I can clarify any confusing parts.
Happy making!


No comments:
Post a Comment
Give us your feedback!